Thursday, December 25, 2014

Plain White Kitchen Cart Turned Classy Country French Cabinet. The Furniture Rescue!

The Furniture Rescue
Here is a plain white kitchen cart that someone put out on the side of the road. I guess you could say that I rescue furniture from the dump, landfills, or any other place that old furniture that people don't want anymore end up.


This piece was really dirty but in really good shape. Normally, if the piece has good bones, you can turn it into a chic designer looking piece. Here are my thoughts on the design process. If you don't have any artistic back ground or feel that you can't come up with a design on your own, do your research. Pick the design scheme and check out images on the internet, magazines or any materials you can get your hands on. Make sure that you pick the colors that best fit your own decor and design scheme.

In the last few months, mine has obviously been French Country. I decided on blues and brown tones for this project.


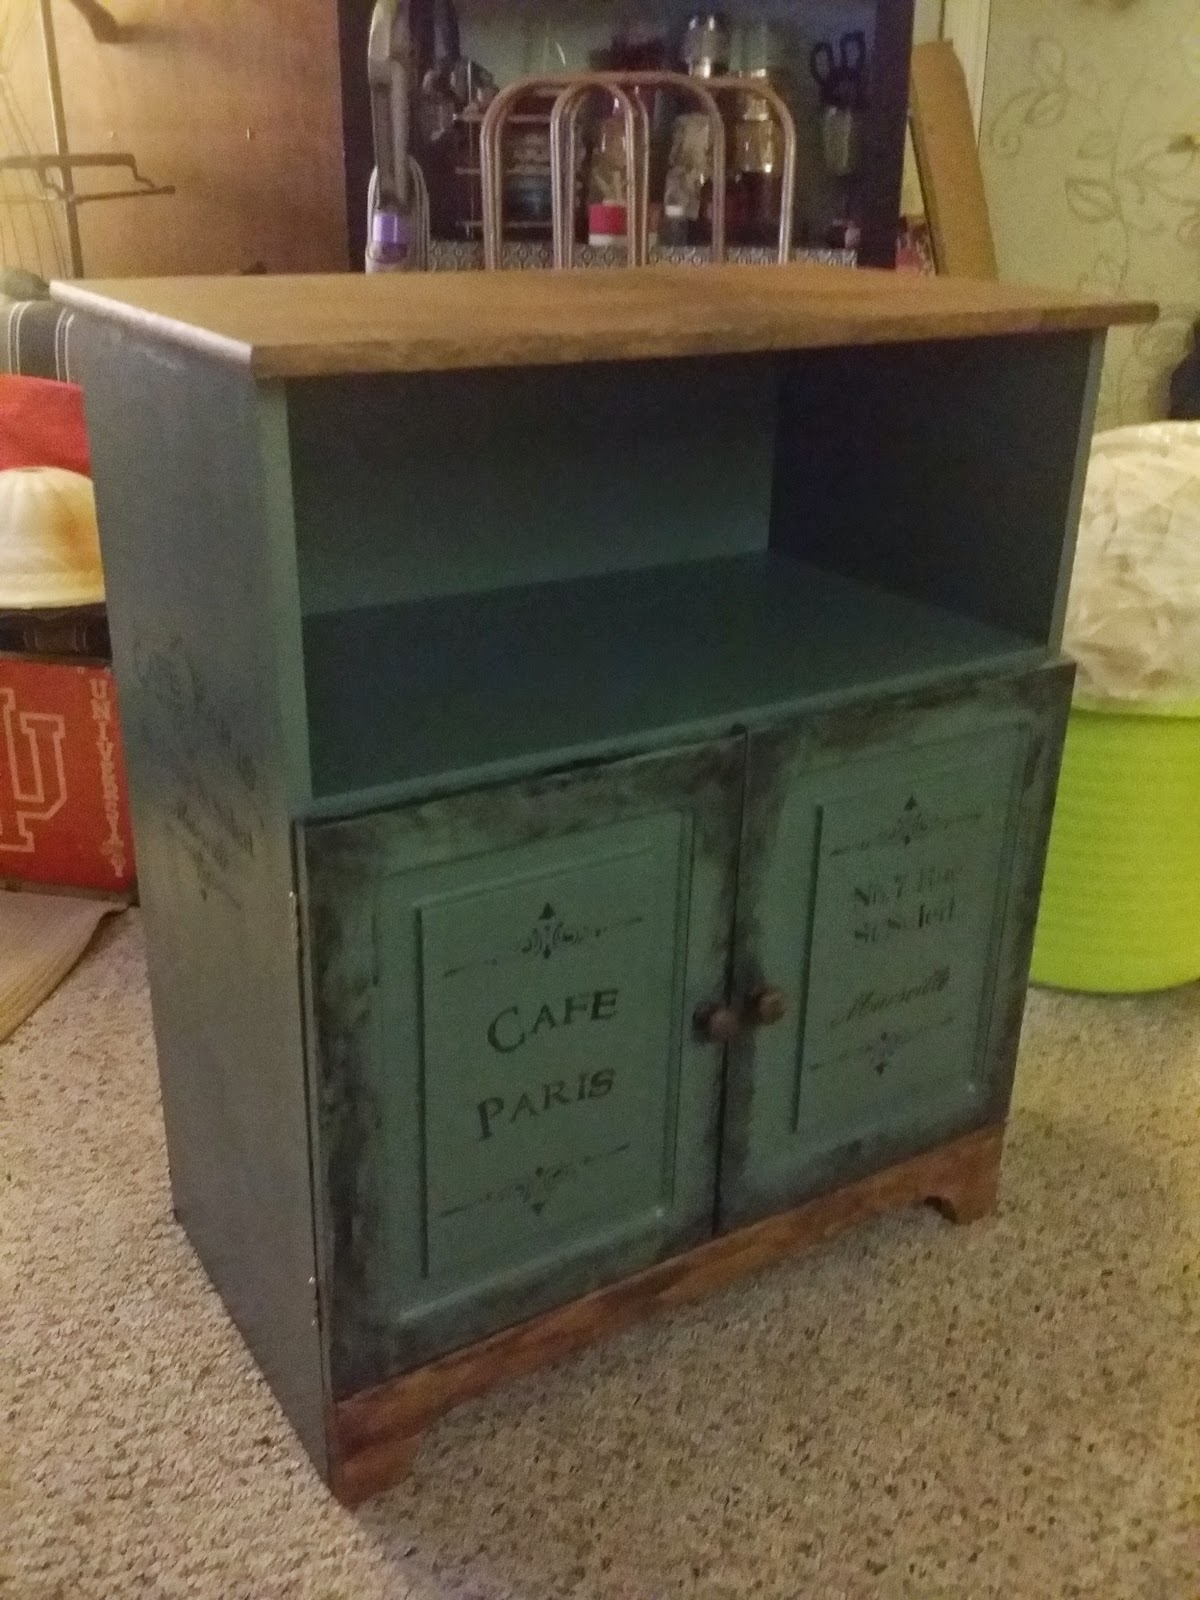
I used the same stencil on this project as I used on the country chair project. It's a stencil that I purchased on Amazon.


I added the stencil on the cabinet fronts and sides as well.


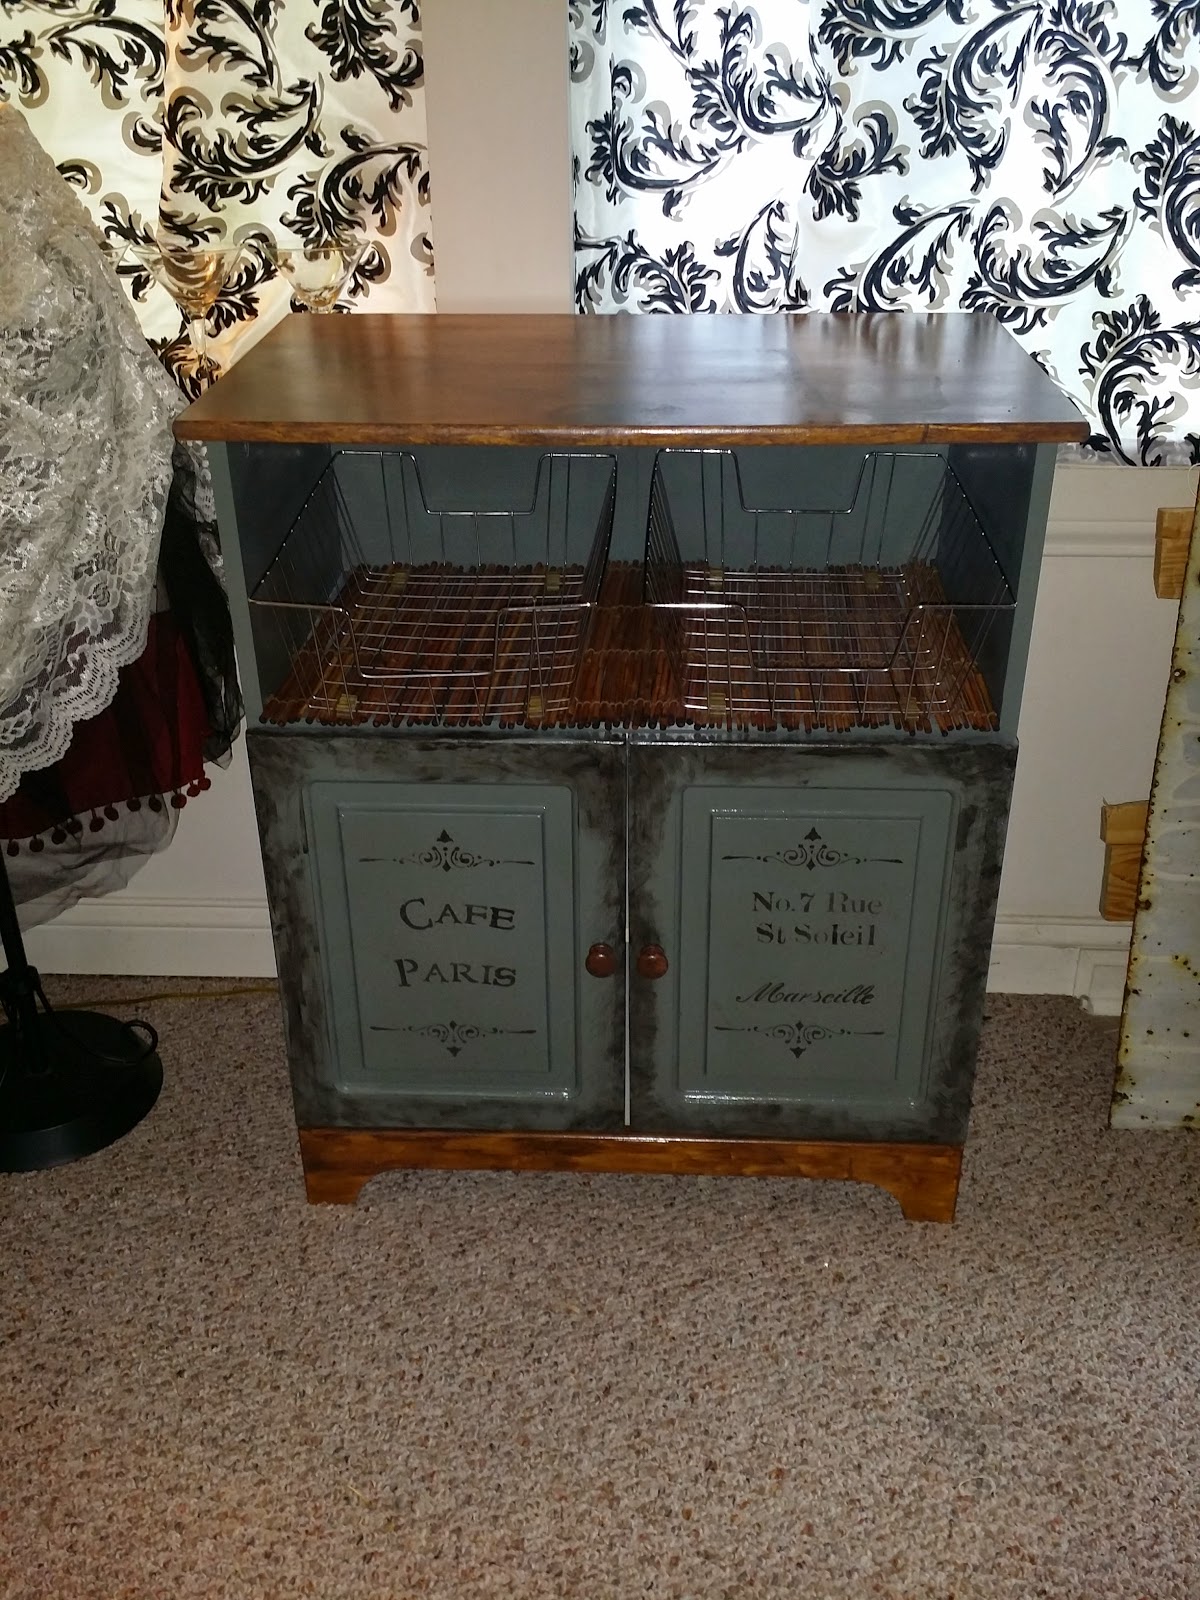
To finish this project off, I added 2 bamboo place-mats and 2 wire baskets to the shelf that can be removed and placed in the cabinet itself. The wire baskets were added to hold either fruit or kitchen towels.The bamboo place-mats were added to buffer any hot plates placed on the top shelf. I love the dual use of all the added amenities.


I would say that this surpassed my expectations. I could have done so many different things to this cabinet and I certainly had many, many ideas. However, this is what I came up with this time around. Maybe next time I will use a black and white mixture along with some yellow tones.

Until next time...

Thanks for reading my blog and Happy Crafting!

Feel free to give me your thoughts on how I can make this blog better for you, the reader! It's always nice to know what my readers think and help me improve on the content.

If you would like to see any of the current furniture pieces 

Please visit


Room Swap Consignments
9307 E Us Highway 36

Avon, Indiana
(317) 602-3950

Turn those plain Country kitchen chairs into Country French Chic


These kitchen table sets are very popular these days. However, they can be a bit plain to some people. These days us crafty people are looking for ways to spruce up anything plain.

As you know by now, I have been on a French Country kick. I found these super awesome stencils on Amazon that I couldn't pass up. They are adorable and French! So how did I spruce up the plain country kitchen chair you ask? Let me show you what I have done...


I found this chair on the side of the road and decided to bring it home. It was in great shape but super plain. When I decided on the design for this chair, I wanted it to stand out. What better color to use than a Glossy Banner Red brush on paint. I also used a common off white house hold paint for the legs and the stencil. I used a glossy spray on top coat to finish off the project.


I find doing these projects are one of the best ways to express my artistic side as well as create an awesome design for your home. It's also a fantastic use of extra time and a great way to save money on a designer piece of furniture.


The next project is going to be super fun. It's a kitchen cart and I do have the before and after photos for this one. It's going to be more of a vintage style French Country piece in blue.
So stayed tuned and give me your feedback. I would love to hear your comments. Let me know if there is something specific you would like to see in the blog.  


As Always, Thank you for reading my blog and have fun Crafting!


If you would like to see any of the current furniture piecesPlease visit


Room Swap Consignments
9307 E Us Highway 36

Avon, Indiana
(317) 602-3950


Tuesday, December 23, 2014

Classy Chairs become a Classy Bench- New and Improved


Classy Chair's Become a Classy Bench

There are not too many people who can take three chairs and turn them into such a great bench. I have seen lots of different blogs and pictures of chairs turned into bench seats. However I wanted to put just a bit of a different spin on this piece. I didn't want a farmhouse look, I wanted a more classy look with a seat style that could be re-upholstered.


There are lots of ways to do this. Normally, the chairs are stuck together and the legs are left in tack. I decided that the middle chair needed the legs removed. It just made better sense as far as the design I was looking for. 


I went looking for a classic fabric and I what I ended up finding were some old curtains from a cute little vintage shop. They just seemed to fit this project. The original chairs were a light brown. I spray painted them lightly with a black matte spray. I left parts of them un-sprayed to give it a bit of a vintage look.


The end result was spectacular! This is definitely suitable for anyone looking to find a unique piece of furniture. It's always good to have a partner in crime to help with the little things. There isn't much to the seating. There are three pieces so they can be easily removed to be re-upholstered with fabric to fit any style.

  
Thanks for reading my blog and Happy Crafting! 

My Favorite Cabinet build to date. Never save the best for last, I say!

They always say to save the best for last. I think I will do exactly the opposite.
 I am starting out with the Best for my first furniture post. 


A few weeks ago, a friend offered me a bunch of free furniture. I gladly accepted the wonderful gesture and went to pick it up. To my surprise, there were two truck loads of different pieces. All of them were from the 70's and were pretty beat up. However, there was an octagon table that caught my eye. I knew right away exactly what I was going to do with it!


The cabinet was a brown stain and I painted it a bright red. I didn't primer the piece because I wanted the bright red color to be muted by the brown stain. I sprayed the piece with about 3 good coats and then attached some old table legs to create a cabinet. I painted the legs black to create a more contemporary look. Once the cabinet dried, I added the brushed nickel handles to finish it off.


This was the very first piece that sold! 

I am so proud of this piece simply because I took it from an old, ordinary floor cabinet, to a beautiful contemporary piece that can be used for anything from a bar to a jewelry cabinet.

Thanks for reading my blog and Happy Crafting!

Saturday, December 20, 2014

What is the Leaky Cauldron? It's the BUZZ


Here it is.. The Leaky Cauldron! Where all the magic is made.... So to speak. I recently started refinishing furniture with my other half. He and I love to work outside, when it's warm. AND of course, we decided to start this business in the month of November.

You won't always find before and after pictures here. However you will find a full description of what and how the furniture has either been enhanced or refinished. 

When I thought about doing this blog, I thought oh lordy, not another blog about furniture... It;s my way of sharing my good fortune and my creative outlet as well. I love to make and share!

All of my inspiration comes from research and my design background. Not everything I make or refinish is Epic. However, it's mine and mine alone. In the coming months, I will share my recent additions to my collection and hope you all enjoy!

As always.... Happy Crafting!